
diff options
| author | 2023-04-22 12:56:22 +0100 | |
|---|---|---|
| committer | 2023-04-22 12:56:22 +0100 | |
| commit | ad5d8b2341d8fe6da8a1731e9106f0cc51e75a8f (patch) | |
| tree | e34a3516ca4f07463593f05ba3aa0beb615cc996 | |
| parent | Add CodeCov CI coverage requirements (#2881) (diff) | |
| download | Auto-GPT-ad5d8b2341d8fe6da8a1731e9106f0cc51e75a8f.tar.gz Auto-GPT-ad5d8b2341d8fe6da8a1731e9106f0cc51e75a8f.tar.bz2 Auto-GPT-ad5d8b2341d8fe6da8a1731e9106f0cc51e75a8f.zip | |
Re-work Docs and split out README (using MkDocs) (#2894)
* Initial Documentation re-org
* remove testing link from readme
* rewrite quickstart
* get code blocks working across mkdocs and github
* add link to plugins repo
* add link to plugins repo and move readme to plugin template repo
* Add emoji to "Extensibility with Plugins" in readme
Co-authored-by: Reinier van der Leer <github@pwuts.nl>
* Make docs deploy workflow path-selective
* Also run workflow when the workflow is updated
* fix readme links under configuration subfolder
* shrink subheadings in readme
---------
Co-authored-by: Toran Bruce Richards <toran.richards@gmail.com>
Co-authored-by: Reinier van der Leer <github@pwuts.nl>
| -rw-r--r-- | .github/workflows/documentation.yml | 26 | ||||
| -rw-r--r-- | .gitignore | 1 | ||||
| -rw-r--r-- | README.md | 512 | ||||
| -rw-r--r-- | docs/configuration/imagegen.md | 15 | ||||
| -rw-r--r-- | docs/configuration/memory.md | 166 | ||||
| -rw-r--r-- | docs/configuration/search.md | 50 | ||||
| -rw-r--r-- | docs/configuration/voice.md | 29 | ||||
| -rw-r--r-- | docs/index.md | 5 | ||||
| -rw-r--r-- | docs/installation.md | 97 | ||||
| -rw-r--r-- | docs/plugins.md | 8 | ||||
| -rw-r--r-- | docs/testing.md | 39 | ||||
| -rw-r--r-- | docs/usage.md | 88 | ||||
| -rw-r--r-- | mkdocs.yml | 20 | ||||
| -rw-r--r-- | requirements.txt | 2 |
14 files changed, 564 insertions, 494 deletions
diff --git a/.github/workflows/documentation.yml b/.github/workflows/documentation.yml new file mode 100644 index 000000000..e1fd422e8 --- /dev/null +++ b/.github/workflows/documentation.yml @@ -0,0 +1,26 @@ +name: Docs + +on: + push: + branches: [ stable ] + paths: + - 'docs/**' + - 'mkdocs.yml' + - '.github/workflows/documentation.yml' + + # Allows you to run this workflow manually from the Actions tab + workflow_dispatch: + +jobs: + build: + runs-on: ubuntu-latest + + steps: + - uses: actions/checkout@v2 + with: + fetch-depth: 0 + - uses: actions/setup-python@v2 + - run: pip install --upgrade pip && pip install mkdocs mkdocs-gen-files + - run: git config user.name 'github-actions[bot]' && git config user.email 'github-actions[bot]@users.noreply.github.com' + - name: Publish docs + run: mkdocs gh-deploy diff --git a/.gitignore b/.gitignore index 0c277d895..1ac55f6b9 100644 --- a/.gitignore +++ b/.gitignore @@ -94,6 +94,7 @@ instance/ # Sphinx documentation docs/_build/ +site/ # PyBuilder target/ @@ -55,477 +55,41 @@ Your support is greatly appreciated. Development of this free, open-source proje - 🧠 GPT-4 instances for text generation - 🔗 Access to popular websites and platforms - 🗃️ File storage and summarization with GPT-3.5 +- 🔌 Extensibility with Plugins ## 📋 Requirements - Environment (pick one) - - [VSCode + devcontainer](https://marketplace.visualstudio.com/items?itemName=ms-vscode-remote.remote-containers): It has been configured in the .devcontainer folder and can be used directly - - Docker - Python 3.10 or later (instructions: [for Windows](https://www.tutorialspoint.com/how-to-install-python-in-windows)) -- [OpenAI API key](https://platform.openai.com/account/api-keys) + - Docker [Docker Hub](https://hub.docker.com/r/significantgravitas/auto-gpt) + - [VSCode + devcontainer](https://marketplace.visualstudio.com/items?itemName=ms-vscode-remote.remote-containers) -### Optional -- Memory backend (pick one) - - [Pinecone](https://www.pinecone.io/) - - [Milvus](https://milvus.io/) - - [Redis](https://redis.io) - - [Weaviate](https://weaviate.io) -- ElevenLabs Key (If you want the AI to speak) +## Quickstart -## ⚠️ OpenAI API Keys Configuration ⚠️ +1. Set up your OpenAI [API Keys](https://platform.openai.com/account/api-keys) +2. Download the [latest release](https://github.com/Significant-Gravitas/Auto-GPT/releases/latest) +3. Install the [dependencies](/docs/installation.md) and set your [environment variables](/docs/installation.md) +4. Configure any additional features you want, or install some [plugins](/docs/plugins.md) +5. [Run](/docs/usage.md) the app -Get your OpenAI API key from: https://platform.openai.com/account/api-keys. +Please see the [documentation](/docs) linked below for full setup instructions and configuration options. -To use OpenAI API key for Auto-GPT, you **NEED** to have billing set up (AKA paid account). +## 💾 Documentation -You can set up paid account at https://platform.openai.com/account/billing/overview. +[Installation](/docs/installation.md) -Important: It's highly recommended that you track your usage on [the Usage page](https://platform.openai.com/account/usage) -You can also set limits on how much you spend on [the Usage limits page](https://platform.openai.com/account/billing/limits). +[Usage](/docs/usage.md) - +[Speech](/docs/configuration/voice.md) -#### **PLEASE ENSURE YOU HAVE DONE THIS STEP BEFORE PROCEEDING. OTHERWISE, NOTHING WILL WORK!** +[Search](/docs/configuration/search.md) -## 💾 Installation +[Plugins](/docs/plugins.md) -To install Auto-GPT, follow these steps: +[Memory](/docs/configuration/memory.md) -1. Make sure you have all the **requirements** listed above. If not, install/get them. +[Image Generation](/docs/configuration/imagegen.md) -_To execute the following commands, open a CMD, Bash, or Powershell window by navigating to a folder on your computer and typing `CMD` in the folder path at the top, then press enter._ - -2. Clone the repository: For this step, you need Git installed. -Note: If you don't have Git, you can just download the [latest stable release](https://github.com/Significant-Gravitas/Auto-GPT/releases/latest) instead (`Source code (zip)`, at the bottom of the page). - - ```bash - git clone -b stable https://github.com/Significant-Gravitas/Auto-GPT.git - ``` - -3. Navigate to the directory where you downloaded the repository. - - ```bash - cd Auto-GPT - ``` - -4. Install the required dependencies. - - ```bash - pip install -r requirements.txt - ``` - -5. Configure Auto-GPT: - 1. Find the file named `.env.template` in the main /Auto-GPT folder. This file may be hidden by default in some operating systems due to the dot prefix. To reveal hidden files, follow the instructions for your specific operating system (e.g., in Windows, click on the "View" tab in File Explorer and check the "Hidden items" box; in macOS, press Cmd + Shift + .). - 2. Create a copy of this file and call it `.env` by removing the `template` extension. The easiest way is to do this in a command prompt/terminal window `cp .env.template .env`. - 3. Open the `.env` file in a text editor. - 4. Find the line that says `OPENAI_API_KEY=`. - 5. After the `"="`, enter your unique OpenAI API Key (without any quotes or spaces). - 6. Enter any other API keys or Tokens for services you would like to use. - 7. Save and close the `.env` file. - - After you complete these steps, you'll have properly configured the API keys for your project. - - Notes: - - See [OpenAI API Keys Configuration](#openai-api-keys-configuration) to get your OpenAI API key. - - Get your ElevenLabs API key from: https://elevenlabs.io. You can view your xi-api-key using the "Profile" tab on the website. - - If you want to use GPT on an Azure instance, set `USE_AZURE` to `True` and then follow these steps: - - Rename `azure.yaml.template` to `azure.yaml` and provide the relevant `azure_api_base`, `azure_api_version` and all the deployment IDs for the relevant models in the `azure_model_map` section: - - `fast_llm_model_deployment_id` - your gpt-3.5-turbo or gpt-4 deployment ID - - `smart_llm_model_deployment_id` - your gpt-4 deployment ID - - `embedding_model_deployment_id` - your text-embedding-ada-002 v2 deployment ID - - Please specify all of these values as double-quoted strings - ```yaml - # Replace string in angled brackets (<>) to your own ID - azure_model_map: - fast_llm_model_deployment_id: "<my-fast-llm-deployment-id>" - ... - ``` - - Details can be found here: https://pypi.org/project/openai/ in the `Microsoft Azure Endpoints` section and here: https://learn.microsoft.com/en-us/azure/cognitive-services/openai/tutorials/embeddings?tabs=command-line for the embedding model. - -## 🔧 Usage - -1. Run the `autogpt` Python module in your terminal. -* On Linux/MacOS: - ```bash - ./run.sh - ``` -* On Windows: - ```bash - .\run.bat - ``` - Running with `--help` after `.\run.bat` lists all the possible command line arguments you can pass. - -2. After each response from Auto-GPT, choose from the options to authorize command(s), -exit the program, or provide feedback to the AI. - 1. Authorize a single command by entering `y` - 2. Authorize a series of _N_ continuous commands by entering `y -N`. For example, entering `y -10` would run 10 automatic iterations. - 3. Enter any free text to give feedback to Auto-GPT. - 4. Exit the program by entering `n` - - -### Logs - -Activity and error logs are located in the `./output/logs` - -To print out debug logs: - -``` -python -m autogpt --debug -``` - -### Docker - -You can also build this into a docker image and run it: - -```bash -docker build -t autogpt . -docker run -it --env-file=./.env -v $PWD/auto_gpt_workspace:/home/appuser/auto_gpt_workspace autogpt -``` - -Or if you have `docker-compose`: -```bash -docker-compose run --build --rm auto-gpt -``` - -You can pass extra arguments, for instance, running with `--gpt3only` and `--continuous` mode: -```bash -docker run -it --env-file=./.env -v $PWD/auto_gpt_workspace:/home/appuser/auto_gpt_workspace autogpt --gpt3only --continuous -``` -```bash -docker-compose run --build --rm auto-gpt --gpt3only --continuous -``` - -### Command Line Arguments -Here are some common arguments you can use when running Auto-GPT: -> Replace anything in angled brackets (<>) to a value you want to specify - -* View all available command line arguments - ```bash - python -m autogpt --help - ``` -* Run Auto-GPT with a different AI Settings file - ```bash - python -m autogpt --ai-settings <filename> - ``` -* Specify a memory backend - ```bash - python -m autogpt --use-memory <memory-backend> - ``` - -> **NOTE**: There are shorthands for some of these flags, for example `-m` for `--use-memory`. Use `python -m autogpt --help` for more information - -## 🗣️ Speech Mode - -Eleven Labs provides voice technologies such as voice design, speech synthesis, and premade voices that auto gpt can use for speech. - -1. Go to [Eleven Labs](https://beta.elevenlabs.io/) and make an account if you don't already have one. -2. Choose and setup the `Starter` plan. -3. Click the top right icon and find "Profile" to locate your API Key. - -In the `.env` file set: -- `ELEVENLABS_API_KEY` -- `ELEVENLABS_VOICE_1_ID` (example: _"premade/Adam"_) - -Enter this command to use TTS _(Text-to-Speech)_ for Auto-GPT - -```bash -python -m autogpt --speak -``` - -### List of IDs with names from eleven labs. You can use the name or ID: - -- Rachel : 21m00Tcm4TlvDq8ikWAM -- Domi : AZnzlk1XvdvUeBnXmlld -- Bella : EXAVITQu4vr4xnSDxMaL -- Antoni : ErXwobaYiN019PkySvjV -- Elli : MF3mGyEYCl7XYWbV9V6O -- Josh : TxGEqnHWrfWFTfGW9XjX -- Arnold : VR6AewLTigWG4xSOukaG -- Adam : pNInz6obpgDQGcFmaJgB -- Sam : yoZ06aMxZJJ28mfd3POQ - -## 🔍 Google API Keys Configuration - -Note: -This section is optional. use the official google api if you are having issues with error 429 when running a google search. -To use the `google_official_search` command, you need to set up your Google API keys in your environment variables. - -Create your project: -1. Go to the [Google Cloud Console](https://console.cloud.google.com/). -2. If you don't already have an account, create one and log in. -3. Create a new project by clicking on the "Select a Project" dropdown at the top of the page and clicking "New Project". -4. Give it a name and click "Create". - -Set up a custom search API and add to your .env file: -5. Go to the [APIs & Services Dashboard](https://console.cloud.google.com/apis/dashboard). -6. Click "Enable APIs and Services". -7. Search for "Custom Search API" and click on it. -8. Click "Enable". -9. Go to the [Credentials](https://console.cloud.google.com/apis/credentials) page. -10. Click "Create Credentials". -11. Choose "API Key". -12. Copy the API key. -13. Set it as an environment variable named `GOOGLE_API_KEY` on your machine (see how to set up environment variables below). -14. [Enable](https://console.developers.google.com/apis/api/customsearch.googleapis.com) the Custom Search API on your project. (Might need to wait few minutes to propagate) - -Set up a custom search engine and add to your .env file: -15. Go to the [Custom Search Engine](https://cse.google.com/cse/all) page. -16. Click "Add". -17. Set up your search engine by following the prompts. You can choose to search the entire web or specific sites. -18. Once you've created your search engine, click on "Control Panel". -19. Click "Basics". -20. Copy the "Search engine ID". -21. Set it as an environment variable named `CUSTOM_SEARCH_ENGINE_ID` on your machine (see how to set up environment variables below). - -_Remember that your free daily custom search quota allows only up to 100 searches. To increase this limit, you need to assign a billing account to the project to profit from up to 10K daily searches._ - -### Setting up environment variables - -For Windows Users: - -```bash -setx GOOGLE_API_KEY "YOUR_GOOGLE_API_KEY" -setx CUSTOM_SEARCH_ENGINE_ID "YOUR_CUSTOM_SEARCH_ENGINE_ID" -``` - -For macOS and Linux users: - -```bash -export GOOGLE_API_KEY="YOUR_GOOGLE_API_KEY" -export CUSTOM_SEARCH_ENGINE_ID="YOUR_CUSTOM_SEARCH_ENGINE_ID" -``` - -## Plugins - -Use the [Auto-GPT Plugin Template](https://github.com/Significant-Gravitas/Auto-GPT-Plugin-Template) as a starting point for creating your own plugins. - -⚠️💀 **WARNING** 💀⚠️: Review the code of any plugin you use thoroughly, as plugins can execute any Python code, potentially leading to malicious activities, such as stealing your API keys. - -### Plugin Installation Steps - -1. **Clone or download the plugin repository:** - Clone the plugin repository, or download the repository as a zip file. - - 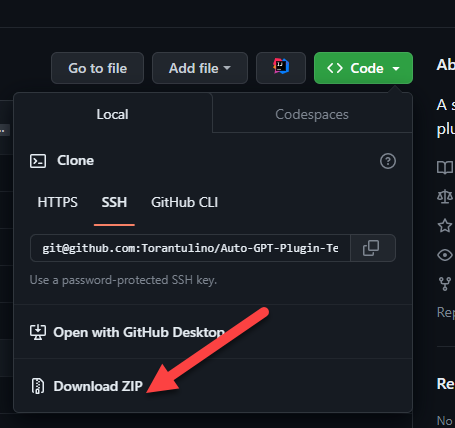 - -2. **Install the plugin's dependencies (if any):** - Navigate to the plugin's folder in your terminal, and run the following command to install any required dependencies: - - ```bash - pip install -r requirements.txt - ``` - -3. **Package the plugin as a Zip file:** - If you cloned the repository, compress the plugin folder as a Zip file. - -4. **Copy the plugin's Zip file:** - Place the plugin's Zip file in the `plugins` folder of the Auto-GPT repository. - -5. **Allowlist the plugin (optional):** - Add the plugin's class name to the `ALLOWLISTED_PLUGINS` in the `.env` file to avoid being prompted with a warning when loading the plugin: - - ``` - ALLOWLISTED_PLUGINS=example-plugin1,example-plugin2,example-plugin3 - ``` - - If the plugin is not allowlisted, you will be warned before it's loaded. - -## Setting Your Cache Type - -By default, Auto-GPT is going to use LocalCache instead of redis or Pinecone. - -To switch to either, change the `MEMORY_BACKEND` env variable to the value that you want: - -* `local` (default) uses a local JSON cache file -* `pinecone` uses the Pinecone.io account you configured in your ENV settings -* `redis` will use the redis cache that you configured -* `milvus` will use the milvus cache that you configured -* `weaviate` will use the weaviate cache that you configured - -## Memory Backend Setup - -### Redis Setup -> _**CAUTION**_ \ -This is not intended to be publicly accessible and lacks security measures. Therefore, avoid exposing Redis to the internet without a password or at all -1. Install docker (or Docker Desktop on Windows). -2. Launch Redis container. - ```bash - docker run -d --name redis-stack-server -p 6379:6379 redis/redis-stack-server:latest - ``` - > See https://hub.docker.com/r/redis/redis-stack-server for setting a password and additional configuration. -3. Set the following settings in `.env`. - > Replace **PASSWORD** in angled brackets (<>) - ```bash - MEMORY_BACKEND=redis - REDIS_HOST=localhost - REDIS_PORT=6379 - REDIS_PASSWORD=<PASSWORD> - ``` - - You can optionally set `WIPE_REDIS_ON_START=False` to persist memory stored in Redis. - -You can specify the memory index for redis using the following: -```bash -MEMORY_INDEX=<WHATEVER> -``` - -### 🌲 Pinecone API Key Setup - -Pinecone lets you store vast amounts of vector-based memory, allowing the agent to load only relevant memories at any given time. - -1. Go to [pinecone](https://app.pinecone.io/) and make an account if you don't already have one. -2. Choose the `Starter` plan to avoid being charged. -3. Find your API key and region under the default project in the left sidebar. - -In the `.env` file set: -- `PINECONE_API_KEY` -- `PINECONE_ENV` (example: _"us-east4-gcp"_) -- `MEMORY_BACKEND=pinecone` - -Alternatively, you can set them from the command line (advanced): - -For Windows Users: - -```bash -setx PINECONE_API_KEY "<YOUR_PINECONE_API_KEY>" -setx PINECONE_ENV "<YOUR_PINECONE_REGION>" # e.g: "us-east4-gcp" -setx MEMORY_BACKEND "pinecone" -``` - -For macOS and Linux users: - -```bash -export PINECONE_API_KEY="<YOUR_PINECONE_API_KEY>" -export PINECONE_ENV="<YOUR_PINECONE_REGION>" # e.g: "us-east4-gcp" -export MEMORY_BACKEND="pinecone" -``` - -### Milvus Setup - -[Milvus](https://milvus.io/) is an open-source, highly scalable vector database to store huge amounts of vector-based memory and provide fast relevant search. - -- setup milvus database, keep your pymilvus version and milvus version same to avoid compatible issues. - - setup by open source [Install Milvus](https://milvus.io/docs/install_standalone-operator.md) - - or setup by [Zilliz Cloud](https://zilliz.com/cloud) -- set `MILVUS_ADDR` in `.env` to your milvus address `host:ip`. -- set `MEMORY_BACKEND` in `.env` to `milvus` to enable milvus as backend. - -**Optional:** -- set `MILVUS_COLLECTION` in `.env` to change milvus collection name as you want, `autogpt` is the default name. - - -### Weaviate Setup -[Weaviate](https://weaviate.io/) is an open-source vector database. It allows to store data objects and vector embeddings from ML-models and scales seamlessly to billion of data objects. [An instance of Weaviate can be created locally (using Docker), on Kubernetes or using Weaviate Cloud Services](https://weaviate.io/developers/weaviate/quickstart). -Although still experimental, [Embedded Weaviate](https://weaviate.io/developers/weaviate/installation/embedded) is supported which allows the Auto-GPT process itself to start a Weaviate instance. To enable it, set `USE_WEAVIATE_EMBEDDED` to `True` and make sure you `pip install "weaviate-client>=3.15.4"`. - -#### Install the Weaviate client - -Install the Weaviate client before usage. - -``` -$ pip install weaviate-client -``` - -#### Setting up environment variables - -In your `.env` file set the following: - -``` -MEMORY_BACKEND=weaviate -WEAVIATE_HOST="127.0.0.1" # the IP or domain of the running Weaviate instance -WEAVIATE_PORT="8080" -WEAVIATE_PROTOCOL="http" -WEAVIATE_USERNAME="your username" -WEAVIATE_PASSWORD="your password" -WEAVIATE_API_KEY="your weaviate API key if you have one" -WEAVIATE_EMBEDDED_PATH="/home/me/.local/share/weaviate" # this is optional and indicates where the data should be persisted when running an embedded instance -USE_WEAVIATE_EMBEDDED=False # set to True to run Embedded Weaviate -MEMORY_INDEX="Autogpt" # name of the index to create for the application -``` - -## View Memory Usage - -View memory usage by using the `--debug` flag :) - - -## 🧠 Memory pre-seeding -Memory pre-seeding allows you to ingest files into memory and pre-seed it before running Auto-GPT. - -```bash -# python data_ingestion.py -h -usage: data_ingestion.py [-h] (--file FILE | --dir DIR) [--init] [--overlap OVERLAP] [--max_length MAX_LENGTH] - -Ingest a file or a directory with multiple files into memory. Make sure to set your .env before running this script. - -options: - -h, --help show this help message and exit - --file FILE The file to ingest. - --dir DIR The directory containing the files to ingest. - --init Init the memory and wipe its content (default: False) - --overlap OVERLAP The overlap size between chunks when ingesting files (default: 200) - --max_length MAX_LENGTH The max_length of each chunk when ingesting files (default: 4000) - -# python data_ingestion.py --dir DataFolder --init --overlap 100 --max_length 2000 -``` -In the example above, the script initializes the memory, ingests all files within the `Auto-Gpt/autogpt/auto_gpt_workspace/DataFolder` directory into memory with an overlap between chunks of 100 and a maximum length of each chunk of 2000. - -Note that you can also use the `--file` argument to ingest a single file into memory and that data_ingestion.py will only ingest files within the `/auto_gpt_workspace` directory. - -The DIR path is relative to the auto_gpt_workspace directory, so `python data_ingestion.py --dir . --init` will ingest everything in `auto_gpt_workspace` directory. - -You can adjust the `max_length` and overlap parameters to fine-tune the way the docuents are presented to the AI when it "recall" that memory: -- Adjusting the overlap value allows the AI to access more contextual information from each chunk when recalling information, but will result in more chunks being created and therefore increase memory backend usage and OpenAI API requests. -- Reducing the `max_length` value will create more chunks, which can save prompt tokens by allowing for more message history in the context, but will also increase the number of chunks. -- Increasing the `max_length` value will provide the AI with more contextual information from each chunk, reducing the number of chunks created and saving on OpenAI API requests. However, this may also use more prompt tokens and decrease the overall context available to the AI. - -Memory pre-seeding is a technique for improving AI accuracy by ingesting relevant data into its memory. Chunks of data are split and added to memory, allowing the AI to access them quickly and generate more accurate responses. It's useful for large datasets or when specific information needs to be accessed quickly. Examples include ingesting API or GitHub documentation before running Auto-GPT. - -⚠️ If you use Redis as your memory, make sure to run Auto-GPT with the `WIPE_REDIS_ON_START=False` in your `.env` file. - -⚠️For other memory backends, we currently forcefully wipe the memory when starting Auto-GPT. To ingest data with those memory backends, you can call the `data_ingestion.py` script anytime during an Auto-GPT run. - -Memories will be available to the AI immediately as they are ingested, even if ingested while Auto-GPT is running. - -## 💀 Continuous Mode ⚠️ - -Run the AI **without** user authorization, 100% automated. -Continuous mode is NOT recommended. -It is potentially dangerous and may cause your AI to run forever or carry out actions you would not usually authorize. -Use at your own risk. - -1. Run the `autogpt` python module in your terminal: - - ```bash - python -m autogpt --speak --continuous - ``` - -2. To exit the program, press Ctrl + C - -## GPT3.5 ONLY Mode - -If you don't have access to the GPT4 api, this mode will allow you to use Auto-GPT! - -```bash -python -m autogpt --speak --gpt3only -``` - -It is recommended to use a virtual machine for tasks that require high security measures to prevent any potential harm to the main computer's system and data. - -## 🖼 Image Generation - -By default, Auto-GPT uses DALL-e for image generation. To use Stable Diffusion, a [Hugging Face API Token](https://huggingface.co/settings/tokens) is required. - -Once you have a token, set these variables in your `.env`: - -```bash -IMAGE_PROVIDER=huggingface -HUGGINGFACE_API_TOKEN="YOUR_HUGGINGFACE_API_TOKEN" -``` - -## Selenium -```bash -sudo Xvfb :10 -ac -screen 0 1024x768x24 & DISPLAY=:10 <YOUR_CLIENT> -``` ## ⚠️ Limitations @@ -562,43 +126,3 @@ We look forward to connecting with you and hearing your thoughts, ideas, and exp <img src="https://api.star-history.com/svg?repos=Torantulino/auto-gpt&type=Date" alt="Star History Chart"> </a> </p> - -## Run tests - -To run all tests, run the following command: - -```bash -pytest - -``` - -To run just without integration tests: - -``` -pytest --without-integration -``` - -To run just without slow integration tests: - -``` -pytest --without-slow-integration -``` - -To run tests and see coverage, run the following command: - -```bash -pytest --cov=autogpt --without-integration --without-slow-integration -``` - -## Run linter - -This project uses [flake8](https://flake8.pycqa.org/en/latest/) for linting. We currently use the following rules: `E303,W293,W291,W292,E305,E231,E302`. See the [flake8 rules](https://www.flake8rules.com/) for more information. - -To run the linter, run the following command: - -```bash -flake8 autogpt/ tests/ - -# Or, if you want to run flake8 with the same configuration as the CI: -flake8 autogpt/ tests/ --select E303,W293,W291,W292,E305,E231,E302 -``` diff --git a/docs/configuration/imagegen.md b/docs/configuration/imagegen.md new file mode 100644 index 000000000..5d9e35470 --- /dev/null +++ b/docs/configuration/imagegen.md @@ -0,0 +1,15 @@ +## 🖼 Image Generation + +By default, Auto-GPT uses DALL-e for image generation. To use Stable Diffusion, a [Hugging Face API Token](https://huggingface.co/settings/tokens) is required. + +Once you have a token, set these variables in your `.env`: + +``` shell +IMAGE_PROVIDER=huggingface +HUGGINGFACE_API_TOKEN="YOUR_HUGGINGFACE_API_TOKEN" +``` + +## Selenium +``` shell +sudo Xvfb :10 -ac -screen 0 1024x768x24 & DISPLAY=:10 <YOUR_CLIENT> +```
\ No newline at end of file diff --git a/docs/configuration/memory.md b/docs/configuration/memory.md new file mode 100644 index 000000000..8ce713be4 --- /dev/null +++ b/docs/configuration/memory.md @@ -0,0 +1,166 @@ +## Setting Your Cache Type + +By default, Auto-GPT is going to use LocalCache instead of redis or Pinecone. + +To switch to either, change the `MEMORY_BACKEND` env variable to the value that you want: + +* `local` (default) uses a local JSON cache file +* `pinecone` uses the Pinecone.io account you configured in your ENV settings +* `redis` will use the redis cache that you configured +* `milvus` will use the milvus cache that you configured +* `weaviate` will use the weaviate cache that you configured + +## Memory Backend Setup + +Links to memory backends + +- [Pinecone](https://www.pinecone.io/) +- [Milvus](https://milvus.io/) +- [Redis](https://redis.io) +- [Weaviate](https://weaviate.io) + +### Redis Setup +> _**CAUTION**_ \ +This is not intended to be publicly accessible and lacks security measures. Therefore, avoid exposing Redis to the internet without a password or at all +1. Install docker (or Docker Desktop on Windows). +2. Launch Redis container. + +``` shell + docker run -d --name redis-stack-server -p 6379:6379 redis/redis-stack-server:latest +``` +> See https://hub.docker.com/r/redis/redis-stack-server for setting a password and additional configuration. + +3. Set the following settings in `.env`. + > Replace **PASSWORD** in angled brackets (<>) + +``` shell +MEMORY_BACKEND=redis +REDIS_HOST=localhost +REDIS_PORT=6379 +REDIS_PASSWORD=<PASSWORD> +``` + + You can optionally set `WIPE_REDIS_ON_START=False` to persist memory stored in Redis. + +You can specify the memory index for redis using the following: +``` shell +MEMORY_INDEX=<WHATEVER> +``` + +### 🌲 Pinecone API Key Setup + +Pinecone lets you store vast amounts of vector-based memory, allowing the agent to load only relevant memories at any given time. + +1. Go to [pinecone](https://app.pinecone.io/) and make an account if you don't already have one. +2. Choose the `Starter` plan to avoid being charged. +3. Find your API key and region under the default project in the left sidebar. + +In the `.env` file set: +- `PINECONE_API_KEY` +- `PINECONE_ENV` (example: _"us-east4-gcp"_) +- `MEMORY_BACKEND=pinecone` + +Alternatively, you can set them from the command line (advanced): + +For Windows Users: + +``` shell +setx PINECONE_API_KEY "<YOUR_PINECONE_API_KEY>" +setx PINECONE_ENV "<YOUR_PINECONE_REGION>" # e.g: "us-east4-gcp" +setx MEMORY_BACKEND "pinecone" +``` + +For macOS and Linux users: + +``` shell +export PINECONE_API_KEY="<YOUR_PINECONE_API_KEY>" +export PINECONE_ENV="<YOUR_PINECONE_REGION>" # e.g: "us-east4-gcp" +export MEMORY_BACKEND="pinecone" +``` + +### Milvus Setup + +[Milvus](https://milvus.io/) is an open-source, highly scalable vector database to store huge amounts of vector-based memory and provide fast relevant search. + +- setup milvus database, keep your pymilvus version and milvus version same to avoid compatible issues. + - setup by open source [Install Milvus](https://milvus.io/docs/install_standalone-operator.md) + - or setup by [Zilliz Cloud](https://zilliz.com/cloud) +- set `MILVUS_ADDR` in `.env` to your milvus address `host:ip`. +- set `MEMORY_BACKEND` in `.env` to `milvus` to enable milvus as backend. + +**Optional:** +- set `MILVUS_COLLECTION` in `.env` to change milvus collection name as you want, `autogpt` is the default name. + + +### Weaviate Setup +[Weaviate](https://weaviate.io/) is an open-source vector database. It allows to store data objects and vector embeddings from ML-models and scales seamlessly to billion of data objects. [An instance of Weaviate can be created locally (using Docker), on Kubernetes or using Weaviate Cloud Services](https://weaviate.io/developers/weaviate/quickstart). +Although still experimental, [Embedded Weaviate](https://weaviate.io/developers/weaviate/installation/embedded) is supported which allows the Auto-GPT process itself to start a Weaviate instance. To enable it, set `USE_WEAVIATE_EMBEDDED` to `True` and make sure you `pip install "weaviate-client>=3.15.4"`. + +#### Install the Weaviate client + +Install the Weaviate client before usage. + +``` shell +$ pip install weaviate-client +``` + +#### Setting up environment variables + +In your `.env` file set the following: + +``` shell +MEMORY_BACKEND=weaviate +WEAVIATE_HOST="127.0.0.1" # the IP or domain of the running Weaviate instance +WEAVIATE_PORT="8080" +WEAVIATE_PROTOCOL="http" +WEAVIATE_USERNAME="your username" +WEAVIATE_PASSWORD="your password" +WEAVIATE_API_KEY="your weaviate API key if you have one" +WEAVIATE_EMBEDDED_PATH="/home/me/.local/share/weaviate" # this is optional and indicates where the data should be persisted when running an embedded instance +USE_WEAVIATE_EMBEDDED=False # set to True to run Embedded Weaviate +MEMORY_INDEX="Autogpt" # name of the index to create for the application +``` + +## View Memory Usage + +View memory usage by using the `--debug` flag :) + + +## 🧠 Memory pre-seeding +Memory pre-seeding allows you to ingest files into memory and pre-seed it before running Auto-GPT. + +``` shell +# python data_ingestion.py -h +usage: data_ingestion.py [-h] (--file FILE | --dir DIR) [--init] [--overlap OVERLAP] [--max_length MAX_LENGTH] + +Ingest a file or a directory with multiple files into memory. Make sure to set your .env before running this script. + +options: + -h, --help show this help message and exit + --file FILE The file to ingest. + --dir DIR The directory containing the files to ingest. + --init Init the memory and wipe its content (default: False) + --overlap OVERLAP The overlap size between chunks when ingesting files (default: 200) + --max_length MAX_LENGTH The max_length of each chunk when ingesting files (default: 4000) + +# python data_ingestion.py --dir DataFolder --init --overlap 100 --max_length 2000 +``` + +In the example above, the script initializes the memory, ingests all files within the `Auto-Gpt/autogpt/auto_gpt_workspace/DataFolder` directory into memory with an overlap between chunks of 100 and a maximum length of each chunk of 2000. + +Note that you can also use the `--file` argument to ingest a single file into memory and that data_ingestion.py will only ingest files within the `/auto_gpt_workspace` directory. + +The DIR path is relative to the auto_gpt_workspace directory, so `python data_ingestion.py --dir . --init` will ingest everything in `auto_gpt_workspace` directory. + +You can adjust the `max_length` and overlap parameters to fine-tune the way the docuents are presented to the AI when it "recall" that memory: +- Adjusting the overlap value allows the AI to access more contextual information from each chunk when recalling information, but will result in more chunks being created and therefore increase memory backend usage and OpenAI API requests. +- Reducing the `max_length` value will create more chunks, which can save prompt tokens by allowing for more message history in the context, but will also increase the number of chunks. +- Increasing the `max_length` value will provide the AI with more contextual information from each chunk, reducing the number of chunks created and saving on OpenAI API requests. However, this may also use more prompt tokens and decrease the overall context available to the AI. + +Memory pre-seeding is a technique for improving AI accuracy by ingesting relevant data into its memory. Chunks of data are split and added to memory, allowing the AI to access them quickly and generate more accurate responses. It's useful for large datasets or when specific information needs to be accessed quickly. Examples include ingesting API or GitHub documentation before running Auto-GPT. + +⚠️ If you use Redis as your memory, make sure to run Auto-GPT with the `WIPE_REDIS_ON_START=False` in your `.env` file. + +⚠️For other memory backend, we currently forcefully wipe the memory when starting Auto-GPT. To ingest data with those memory backend, you can call the `data_ingestion.py` script anytime during an Auto-GPT run. + +Memories will be available to the AI immediately as they are ingested, even if ingested while Auto-GPT is running.
\ No newline at end of file diff --git a/docs/configuration/search.md b/docs/configuration/search.md new file mode 100644 index 000000000..205a77213 --- /dev/null +++ b/docs/configuration/search.md @@ -0,0 +1,50 @@ +## 🔍 Google API Keys Configuration + +Note: +This section is optional. use the official google api if you are having issues with error 429 when running a google search. +To use the `google_official_search` command, you need to set up your Google API keys in your environment variables. + +Create your project: +1. Go to the [Google Cloud Console](https://console.cloud.google.com/). +2. If you don't already have an account, create one and log in. +3. Create a new project by clicking on the "Select a Project" dropdown at the top of the page and clicking "New Project". +4. Give it a name and click "Create". + +Set up a custom search API and add to your .env file: +5. Go to the [APIs & Services Dashboard](https://console.cloud.google.com/apis/dashboard). +6. Click "Enable APIs and Services". +7. Search for "Custom Search API" and click on it. +8. Click "Enable". +9. Go to the [Credentials](https://console.cloud.google.com/apis/credentials) page. +10. Click "Create Credentials". +11. Choose "API Key". +12. Copy the API key. +13. Set it as an environment variable named `GOOGLE_API_KEY` on your machine (see how to set up environment variables below). +14. [Enable](https://console.developers.google.com/apis/api/customsearch.googleapis.com) the Custom Search API on your project. (Might need to wait few minutes to propagate) + +Set up a custom serach engine and add to your .env file: +15. Go to the [Custom Search Engine](https://cse.google.com/cse/all) page. +16. Click "Add". +17. Set up your search engine by following the prompts. You can choose to search the entire web or specific sites. +18. Once you've created your search engine, click on "Control Panel". +19. Click "Basics". +20. Copy the "Search engine ID". +21. Set it as an environment variable named `CUSTOM_SEARCH_ENGINE_ID` on your machine (see how to set up environment variables below). + +_Remember that your free daily custom search quota allows only up to 100 searches. To increase this limit, you need to assign a billing account to the project to profit from up to 10K daily searches._ + +### Setting up environment variables + +For Windows Users: + +``` +setx GOOGLE_API_KEY "YOUR_GOOGLE_API_KEY" +setx CUSTOM_SEARCH_ENGINE_ID "YOUR_CUSTOM_SEARCH_ENGINE_ID" +``` + +For macOS and Linux users: + +``` +export GOOGLE_API_KEY="YOUR_GOOGLE_API_KEY" +export CUSTOM_SEARCH_ENGINE_ID="YOUR_CUSTOM_SEARCH_ENGINE_ID" +```
\ No newline at end of file diff --git a/docs/configuration/voice.md b/docs/configuration/voice.md new file mode 100644 index 000000000..a0b522b69 --- /dev/null +++ b/docs/configuration/voice.md @@ -0,0 +1,29 @@ +## Voice + +Enter this command to use TTS _(Text-to-Speech)_ for Auto-GPT + +``` shell +python -m autogpt --speak +``` + +Eleven Labs provides voice technologies such as voice design, speech synthesis, and premade voices that auto gpt can use for speech. + +1. Go to [Eleven Labs](https://beta.elevenlabs.io/) and make an account if you don't already have one. +2. Choose and setup the `Starter` plan. +3. Click the top right icon and find "Profile" to locate your API Key. + +In the `.env` file set: +- `ELEVENLABS_API_KEY` +- `ELEVENLABS_VOICE_1_ID` (example: _"premade/Adam"_) + +### List of IDs with names from eleven labs. You can use the name or ID: + +- Rachel : 21m00Tcm4TlvDq8ikWAM +- Domi : AZnzlk1XvdvUeBnXmlld +- Bella : EXAVITQu4vr4xnSDxMaL +- Antoni : ErXwobaYiN019PkySvjV +- Elli : MF3mGyEYCl7XYWbV9V6O +- Josh : TxGEqnHWrfWFTfGW9XjX +- Arnold : VR6AewLTigWG4xSOukaG +- Adam : pNInz6obpgDQGcFmaJgB +- Sam : yoZ06aMxZJJ28mfd3POQ
\ No newline at end of file diff --git a/docs/index.md b/docs/index.md new file mode 100644 index 000000000..669577bcc --- /dev/null +++ b/docs/index.md @@ -0,0 +1,5 @@ +# Auto-GPT + +Welcome to Auto-GPT. Please follow the [Installation](installation.md) guide to get started. + +It is recommended to use a virtual machine for tasks that require high security measures to prevent any potential harm to the main computer's system and data. diff --git a/docs/installation.md b/docs/installation.md new file mode 100644 index 000000000..f80b11f70 --- /dev/null +++ b/docs/installation.md @@ -0,0 +1,97 @@ +# 💾 Installation + +## ⚠️ OpenAI API Keys Configuration + +Get your OpenAI API key from: https://platform.openai.com/account/api-keys. + +To use OpenAI API key for Auto-GPT, you **NEED** to have billing set up (AKA paid account). + +You can set up paid account at https://platform.openai.com/account/billing/overview. + +Important: It's highly recommended that you track your usage on [the Usage page](https://platform.openai.com/account/usage) +You can also set limits on how much you spend on [the Usage limits page](https://platform.openai.com/account/billing/limits). + + + +**PLEASE ENSURE YOU HAVE DONE THIS STEP BEFORE PROCEEDING. OTHERWISE, NOTHING WILL WORK!** + +## Steps + +To install Auto-GPT, follow these steps: + +1. Make sure you have all the **requirements** listed in the [README](../README.md). If not, install/get them. + +_To execute the following commands, open a CMD, Bash, or Powershell window by navigating to a folder on your computer and typing `CMD` in the folder path at the top, then press enter._ + +2. Clone the repository: For this step, you need Git installed. +Note: If you don't have Git, you can just download the [latest stable release](https://github.com/Significant-Gravitas/Auto-GPT/releases/latest) instead (`Source code (zip)`, at the bottom of the page). + +``` shell + git clone -b stable https://github.com/Significant-Gravitas/Auto-GPT.git +``` + +3. Navigate to the directory where you downloaded the repository. + +``` shell + cd Auto-GPT +``` + +4. Install the required dependencies. + +``` shell + pip install -r requirements.txt +``` + +5. Configure Auto-GPT: + 1. Find the file named `.env.template` in the main /Auto-GPT folder. This file may be hidden by default in some operating systems due to the dot prefix. To reveal hidden files, follow the instructions for your specific operating system (e.g., in Windows, click on the "View" tab in File Explorer and check the "Hidden items" box; in macOS, press Cmd + Shift + .). + 2. Create a copy of this file and call it `.env` by removing the `template` extension. The easiest way is to do this in a command prompt/terminal window `cp .env.template .env`. + 3. Open the `.env` file in a text editor. + 4. Find the line that says `OPENAI_API_KEY=`. + 5. After the `"="`, enter your unique OpenAI API Key (without any quotes or spaces). + 6. Enter any other API keys or Tokens for services you would like to use. + 7. Save and close the `.env` file. + + After you complete these steps, you'll have properly configured the API keys for your project. + + Notes: + - See [OpenAI API Keys Configuration](#openai-api-keys-configuration) to get your OpenAI API key. + - Get your ElevenLabs API key from: https://elevenlabs.io. You can view your xi-api-key using the "Profile" tab on the website. + - If you want to use GPT on an Azure instance, set `USE_AZURE` to `True` and then follow these steps: + - Rename `azure.yaml.template` to `azure.yaml` and provide the relevant `azure_api_base`, `azure_api_version` and all the deployment IDs for the relevant models in the `azure_model_map` section: + - `fast_llm_model_deployment_id` - your gpt-3.5-turbo or gpt-4 deployment ID + - `smart_llm_model_deployment_id` - your gpt-4 deployment ID + - `embedding_model_deployment_id` - your text-embedding-ada-002 v2 deployment ID + - Please specify all of these values as double-quoted strings + +``` shell +# Replace string in angled brackets (<>) to your own ID +azure_model_map: + fast_llm_model_deployment_id: "<my-fast-llm-deployment-id>" + ... +``` + - Details can be found here: https://pypi.org/project/openai/ in the `Microsoft Azure Endpoints` section and here: https://learn.microsoft.com/en-us/azure/cognitive-services/openai/tutorials/embeddings?tabs=command-line for the embedding model. + +## Docker + +You can also build this into a docker image and run it: + +``` shell +docker build -t autogpt . +docker run -it --env-file=./.env -v $PWD/auto_gpt_workspace:/home/appuser/auto_gpt_workspace autogpt +``` + +Or if you have `docker-compose`: +``` shell +docker-compose run --build --rm auto-gpt +``` + +You can pass extra arguments, for instance, running with `--gpt3only` and `--continuous` mode: +``` shell +docker run -it --env-file=./.env -v $PWD/auto_gpt_workspace:/home/appuser/auto_gpt_workspace autogpt --gpt3only --continuous +``` + +``` shell +docker-compose run --build --rm auto-gpt --gpt3only --continuous +``` + +Alternatively, you can pull the latest release directly from [Docker Hub](https://hub.docker.com/r/significantgravitas/auto-gpt)
\ No newline at end of file diff --git a/docs/plugins.md b/docs/plugins.md new file mode 100644 index 000000000..cc4a32992 --- /dev/null +++ b/docs/plugins.md @@ -0,0 +1,8 @@ +## Plugins + +⚠️💀 **WARNING** 💀⚠️: Review the code of any plugin you use thoroughly, as plugins can execute any Python code, potentially leading to malicious activities, such as stealing your API keys. + +See our [Plugins Repo](https://github.com/Significant-Gravitas/Auto-GPT-Plugins) for more info on how to install all the amazing plugins the community has built! + +Alternatively, developers can use the [Auto-GPT Plugin Template](https://github.com/Significant-Gravitas/Auto-GPT-Plugin-Template) as a starting point for creating your own plugins. + diff --git a/docs/testing.md b/docs/testing.md new file mode 100644 index 000000000..d87c9acd5 --- /dev/null +++ b/docs/testing.md @@ -0,0 +1,39 @@ +## Run tests + +To run all tests, run the following command: + +``` +pytest +``` + +To run just without integration tests: + +``` +pytest --without-integration +``` + +To run just without slow integration tests: + +``` +pytest --without-slow-integration +``` + +To run tests and see coverage, run the following command: + +``` +pytest --cov=autogpt --without-integration --without-slow-integration +``` + +## Run linter + +This project uses [flake8](https://flake8.pycqa.org/en/latest/) for linting. We currently use the following rules: `E303,W293,W291,W292,E305,E231,E302`. See the [flake8 rules](https://www.flake8rules.com/) for more information. + +To run the linter, run the following command: + +``` +flake8 autogpt/ tests/ + +# Or, if you want to run flake8 with the same configuration as the CI: + +flake8 autogpt/ tests/ --select E303,W293,W291,W292,E305,E231,E302 +```
\ No newline at end of file diff --git a/docs/usage.md b/docs/usage.md new file mode 100644 index 000000000..9b2185ae0 --- /dev/null +++ b/docs/usage.md @@ -0,0 +1,88 @@ +# Usage + +1. Run the `autogpt` Python module in your terminal. +* On Linux/MacOS: + ``` + ./run.sh + ``` +* On Windows: + ``` + .\run.bat + ``` + Running with `--help` after `.\run.bat` lists all the possible command line arguments you can pass. + +2. After each response from Auto-GPT, choose from the options to authorize command(s), +exit the program, or provide feedback to the AI. + 1. Authorize a single command by entering `y` + 2. Authorize a series of _N_ continuous commands by entering `y -N`. For example, entering `y -10` would run 10 automatic iterations. + 3. Enter any free text to give feedback to Auto-GPT. + 4. Exit the program by entering `n` + + +## Command Line Arguments +Here are some common arguments you can use when running Auto-GPT: +> Replace anything in angled brackets (<>) to a value you want to specify + +* View all available command line arguments + ``` + python -m autogpt --help + ``` +* Run Auto-GPT with a different AI Settings file + ``` + python -m autogpt --ai-settings <filename> + ``` +* Specify a memory backend + ``` + python -m autogpt --use-memory <memory-backend> + ``` + +> **NOTE**: There are shorthands for some of these flags, for example `-m` for `--use-memory`. Use `python -m autogpt --help` for more information + +### Speak Mode + +Enter this command to use TTS _(Text-to-Speech)_ for Auto-GPT + +``` +python -m autogpt --speak +``` + +### 💀 Continuous Mode ⚠️ + +Run the AI **without** user authorization, 100% automated. +Continuous mode is NOT recommended. +It is potentially dangerous and may cause your AI to run forever or carry out actions you would not usually authorize. +Use at your own risk. + +1. Run the `autogpt` python module in your terminal: + + ``` + python -m autogpt --continuous + ``` + +2. To exit the program, press Ctrl + C + +### GPT3.5 ONLY Mode + +If you don't have access to the GPT4 api, this mode will allow you to use Auto-GPT! + +``` shell +python -m autogpt --gpt3only +``` + +### GPT4 ONLY Mode + +If you do have access to the GPT4 api, this mode will allow you to use Auto-GPT solely using the GPT-4 API for increased intelligence (and cost!) + +``` shell +python -m autogpt --gpt4only +``` + +## Logs + +Activity and error logs are located in the `./output/logs` + +To print out debug logs: + +``` shell +python -m autogpt --debug +```
\ No newline at end of file diff --git a/mkdocs.yml b/mkdocs.yml new file mode 100644 index 000000000..b8e529eae --- /dev/null +++ b/mkdocs.yml @@ -0,0 +1,20 @@ +site_name: Auto-GPT +site_url: https://github.com/Significant-Gravitas/Auto-GPT +repo_url: https://github.com/Significant-Gravitas/Auto-GPT +nav: + - Home: index.md + - Installation: installation.md + - Usage: usage.md + - Plugins: plugins.md + - Testing: testing.md + - Configuration: + - Search: configuration/search.md + - Memory: configuration/memory.md + - Voice: configuration/voice.md + - Image Generation: configuration/imagegen.md + + - Code of Conduct: ../CODE_OF_CONDUCT.md + - Contributing: ../CONTRIBUTING.md + - License: ../LICENSE + +theme: readthedocs
\ No newline at end of file diff --git a/requirements.txt b/requirements.txt index 5d98e6128..de550791d 100644 --- a/requirements.txt +++ b/requirements.txt @@ -33,6 +33,8 @@ black isort gitpython==3.1.31 auto-gpt-plugin-template +mkdocs + # OpenAI and Generic plugins import openapi-python-client==0.13.4 |